Use Webhooks to Send Handwritten Cards from a Klaviyo Flow
IgnitePOST integrates with Klaviyo Webhooks to allow you to create automated flows that trigger handwritten cards and notes when your contacts meet certain conditions. In this short guide we show you how to setup Klaviyo Webhooks to send IgnitePOST handwritten cards from within a Klaviyo Flow.

.svg)


Background
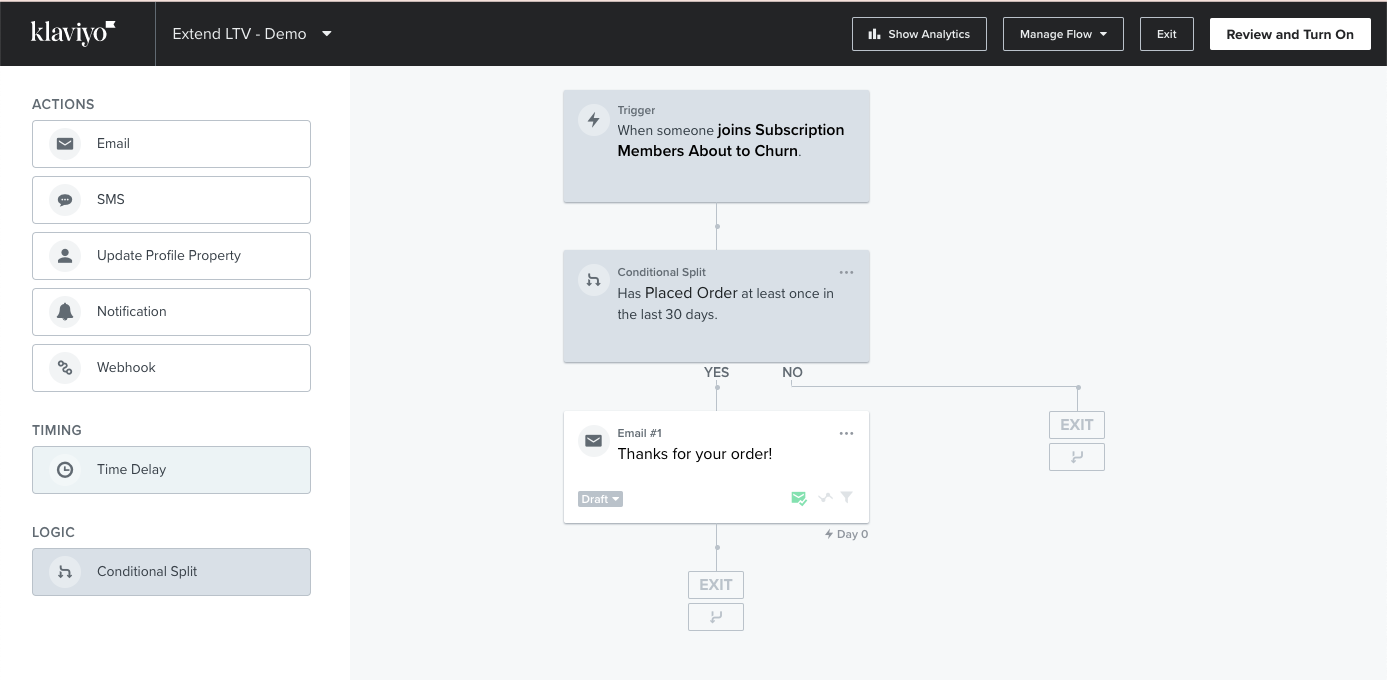
In Klaviyo, a flow is an automated sequence that is set in motion by a specific trigger and then includes one or more steps. Flows make it easy to initiate and nurture relationships with your subscribers and customers over the course of their lifecycle. You can automate messages that will help grow your business, without losing any of the personalization and relevancy needed to build strong customer loyalty.
Klaviyo flows allow you to trigger a message, or series of messages, based on when someone joins a list, is added to a segment or takes any other action (such as making a purchase or abandoning a cart).
Flows help you send timely communications to recipients via email, SMS, and now real pen & ink handwritten notes!
Klaviyo recently released their Webhook feature, that allows a user to trigger a webhook from any point in a flow.
Read on for more details on how to leverage the Webhook feature to send highly personalized handwritten note campaigns from any point within a flow.
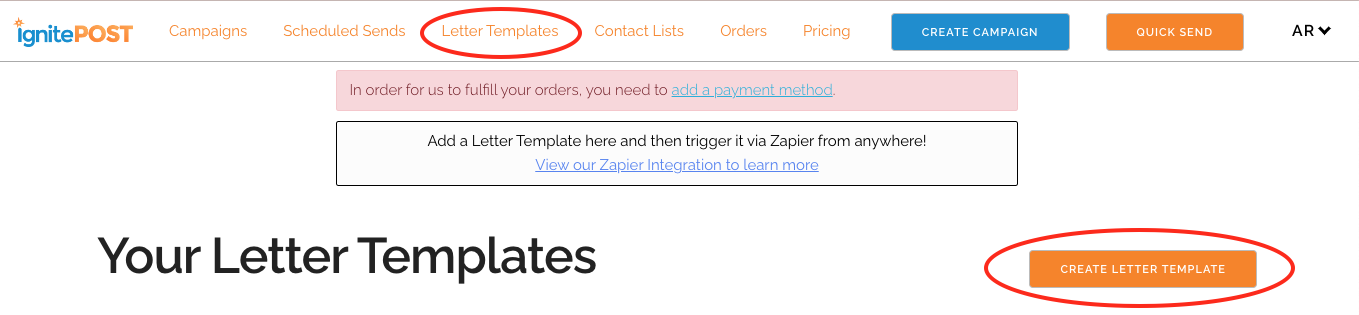
1. Log in to your IgnitePOST Account
If you don't have an IgnitePOST Account yet, click here to create a FREE account. Once logged in, navigate to the 'Letter Templates' area by first clicking on the 'Letter Templates' link at the top of the dashboard and then click the orange 'Create Letter Template' button.
We're going to create a letter template on IgnitePOST using the letter template designer. Once you have created a letter template on your IgnitePOST dashboard, we'll move over to Klaviyo and show you how to trigger it.
2. Use the IgnitePOST Letter Template Designer to design your handwritten card
First start by giving your Letter Template a descriptive name. This is for your internal use only, but since you can create as many Letter Templates as you want, it's a good idea to give each one a descriptive name.
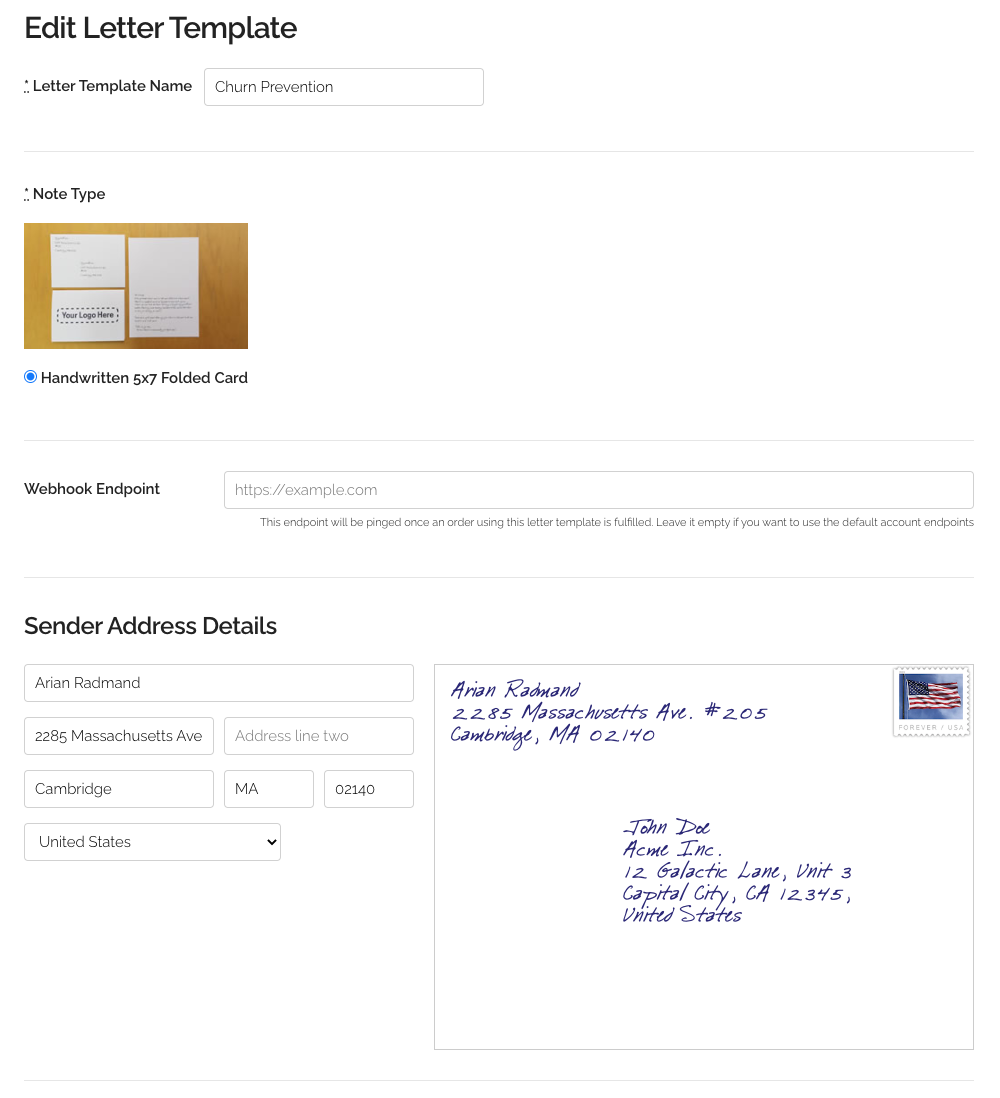
3. Fill in Default Values
Fill in the default values you wish to use for your Return Address as well as card message. Since there is a limited space on the cards, we recommend typing out your card message here, where you're able to see a preview of the message and ensure it will fit on the card. Remember, when you trigger the handwritten card from your Klaviyo flow, you can overwrite every part of the card. However, using the designer here is the easiest way to set the card up first.
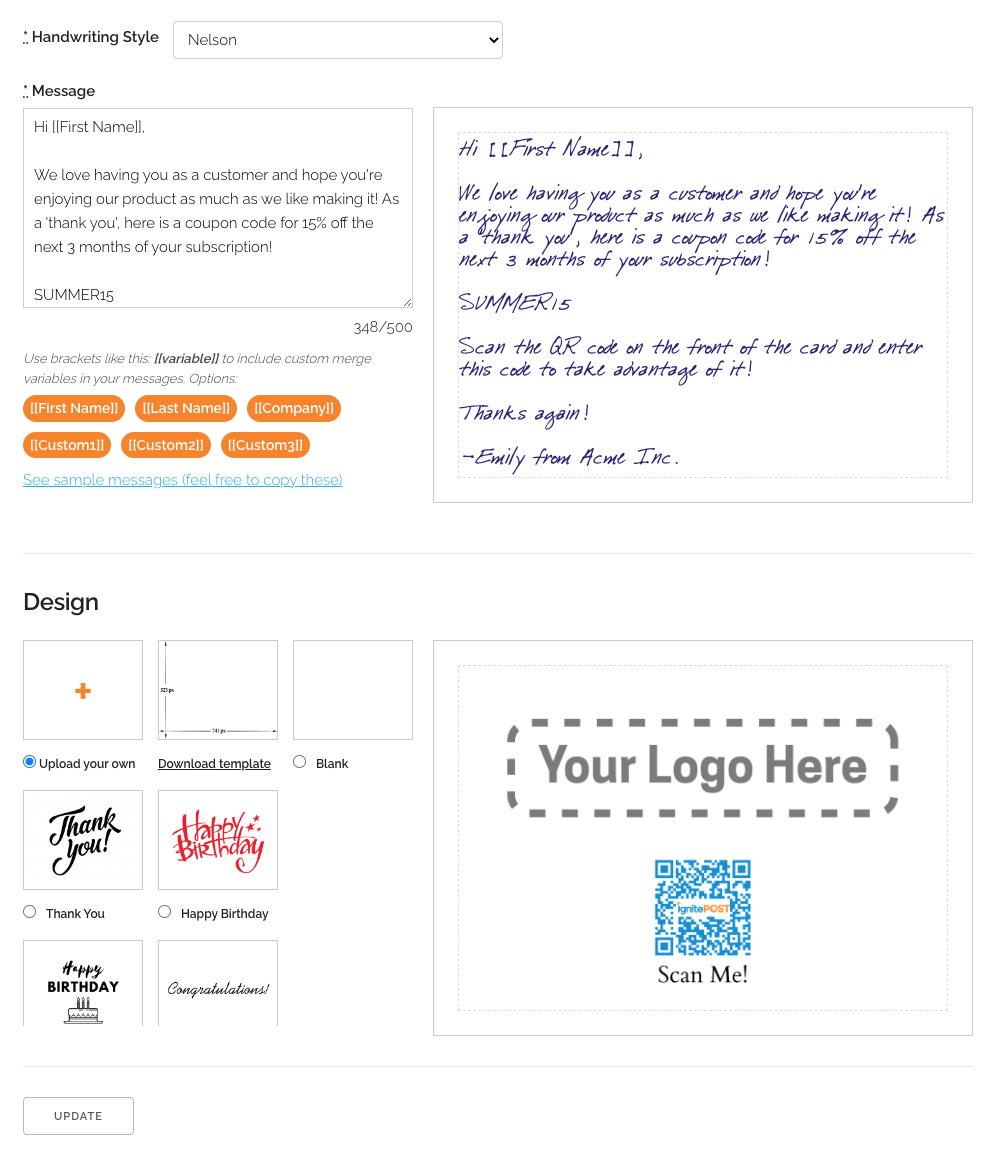
4. Select your Card Image
Select the card image you wish to use on the front of the card. You can choose an image from our card image library, or you can choose to upload your own image! Once you are happy, click the 'Create' or 'Update' button to save your letter template. Once you have saved your template, make a note of the template ID (this will be the last part of the URL when you are viewing your template... see the below image).
5. Trigger your Letter Template from Klaviyo
Now that you have your letter template set up, let's head over to Klaviyo and trigger that letter template at the appropriate time. To do so, log in to your Klaviyo account and navigate to the Flow where you would like to trigger your handwritten letter.
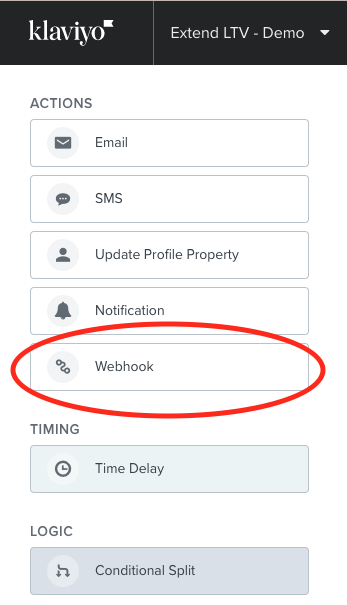
6. Set up a Webhook
We'll be using Klaviyo's Webhook feature to trigger the handwritten card you have set up on IgnitePOST. On the left side of the screen, you'll see the 'Webhook' option. Simply move your cursor over the 'Webhook' option and drag it to the exact spot in the flow where you want your handwritten card triggered.
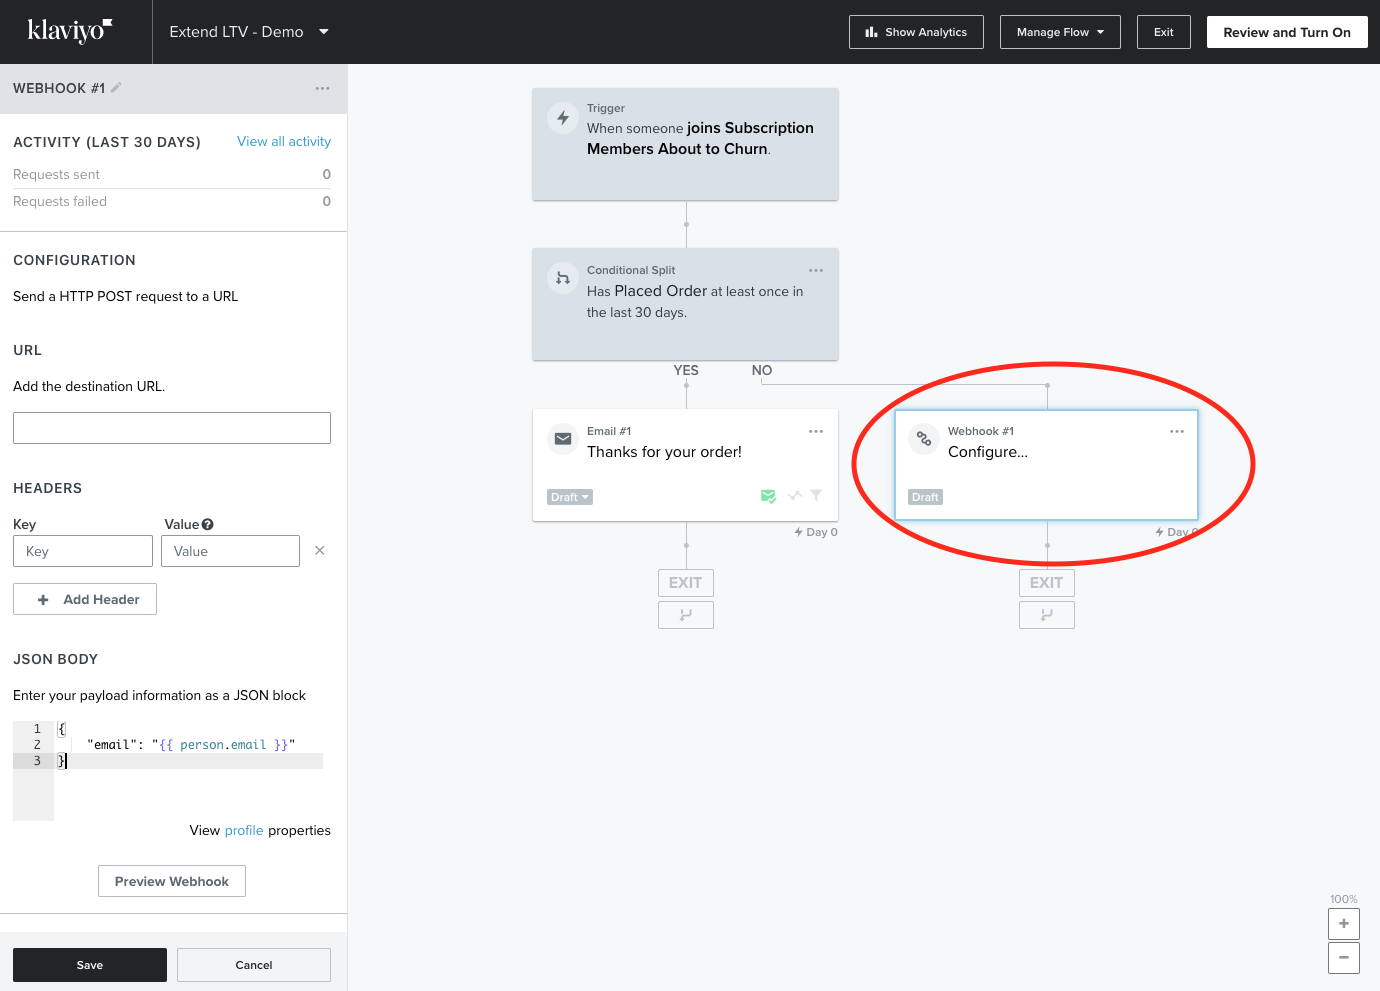
7. Customize your Webhook
Now that you have a Webhook set up, click on the webhook object on the right side in your flow and let's customize it.

First, start by giving your webhook a name. This is for internal use only
Then, set up the destination URL by entering the URL of IgnitePOST's Order creation API endpoint:
https://dashboard.ignitepost.com/api/v1/orders
Next, under the header section, enter the Key / Value pair for your API key. The Key will always have the value 'X-TOKEN'.
The 'Value' field should be your API key. If you don't have an API key, you can generate one by visiting this link: https://dashboard.ignitepost.com/profile/api_keys
Make sure to click 'Show' next to your API key and then copy/paste your API key into the 'Value' field next to the 'X-TOKEN' key.

8. Set up the Webhook JSON Body
To make life easier, we have a pre configured template you can just copy/paste into the JSON Body area. To use this template, first click in the area that says 'JSON Body' and delete all content.

Next, copy the content below and paste it into the 'JSON BODY' section of the Webhook:
9. Customize your Webhook Data
As you can see, the JSON BODY template needs to be customized to contain the correct values. If you used the template we provided, most of the default values will automatically pull in the correct values for the contact's name and address.
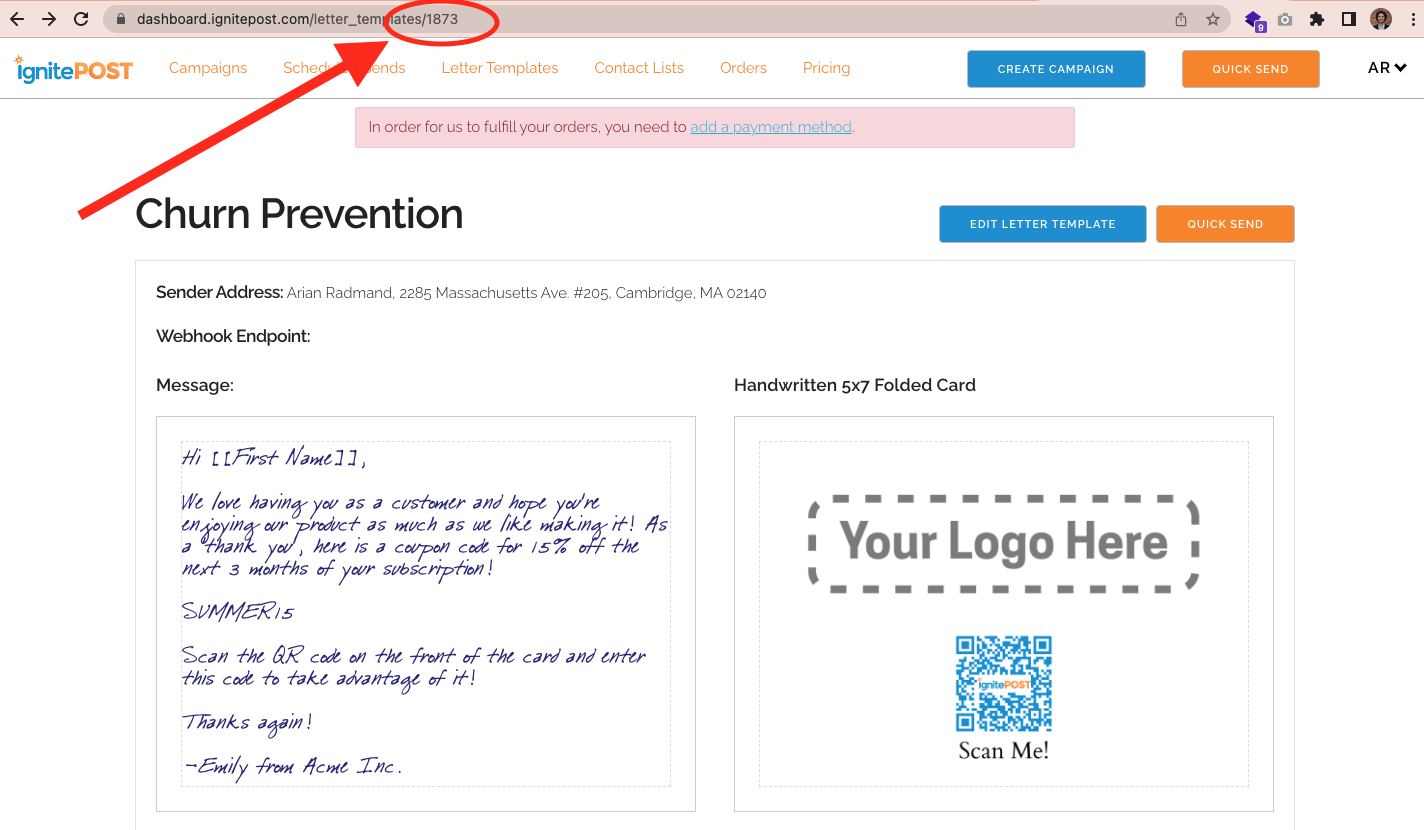
Since we created a specific letter template to use, let's make sure the Webhook triggers the correct IgnitePOST Letter Template. To do so, find the Letter Template ID by visiting your IgnitePOST dashboard, clicking on the 'Letter Templates' link at the top of the page, and then clicking 'View' next to the Letter Template you which to send.
The Letter Template ID is the last part of the URL on this page (as an example it is "1872" in the example below):
Replace the Letter Template ID in the template you just copy/pasted to match the Letter Template ID you wish to use. This is how IgnitePOST knows what image to put on the front of your card:
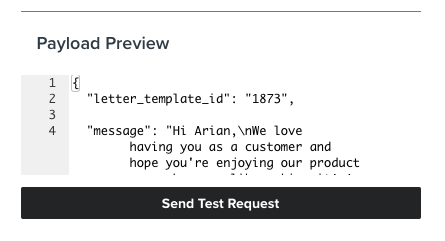
Next, edit the message that you want to send. This is where you can personalize the content of the card using any of the fields or information that is contained within Klaviyo.
Remember, there is a 500 character maximum since there is a limit to how much space exists on the card.
When you are ready to test your message, click on the 'Send Test Request' button. Klaviyo will then let you select a user from your account and fill in the request details for this user. Don't worry, we will not send any cards out until your API key has been turned on. All API keys are in TEST MODE by default until you email us and tell us to turn them on.
When you trigger a test request, you will most likely see the below message saying there is an error. This is normal and expected behavior. As long as the status code is 200 or 201, the test will be successful:

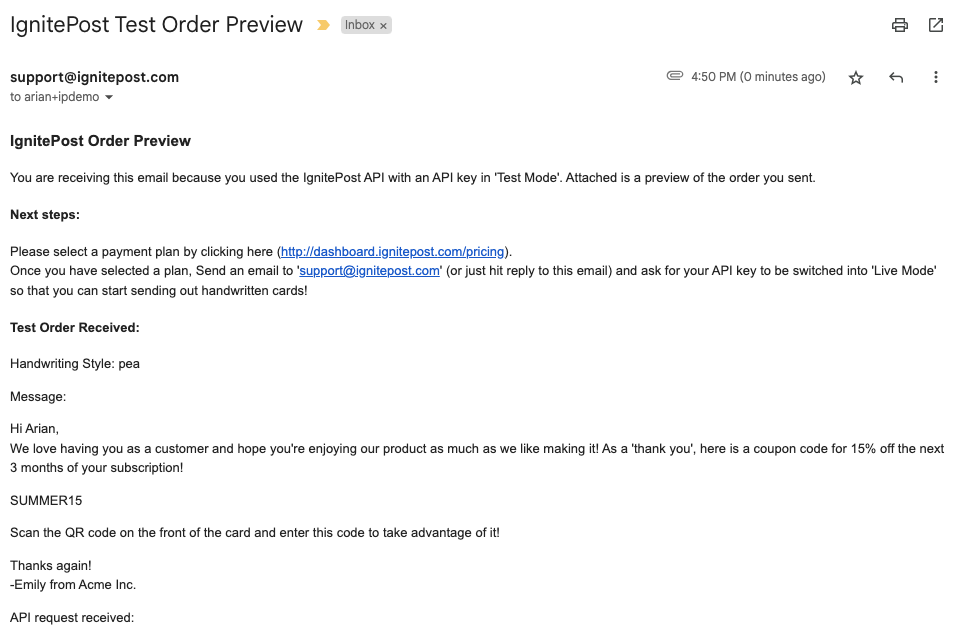
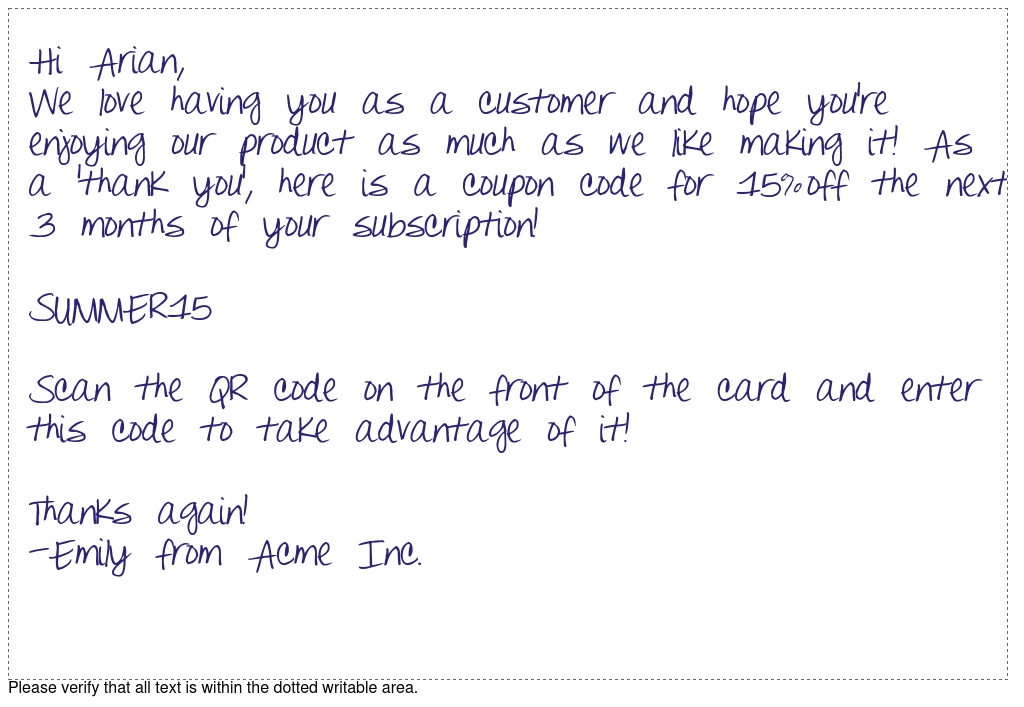
10. Confirm your Handwritten Card Looks as Expected
When a test request is triggered, IgnitePOST will email you a Test Order Preview to the email address associated with your account. There, you will be able to see the handwritten message and card image to confirm everything looks appropriate. If you need to make any tweaks or changes, simply go into the Webhook notification on your Klaviyo flow and adjust the message as appropriate. You can trigger as many Test Order Previews as you like to make sure you get your card looking exactly right.

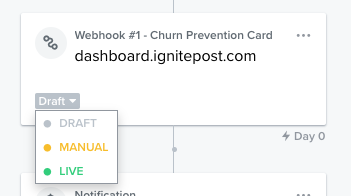
11. Turn on your API Key and Webhook
The last step is to turn on your IgnitePOST API key as well as your Webhook in Klaviyo. To switch your IgnitePOST API Key from Test Mode to Live mode, simply email 'support@ignitepost.com' and let us know that you wish to turn on your API key.
Similarly, don't forget to navigate to the Webhook you set up in your Klaviyo Flow and switch it to 'Live':
That's it! You're done! You now have a Klaviyo flow that will trigger a personalized, handwritten note exactly when you need it!

At IgnitePOST, we offer Managed Services that provides strategy, creative design, copywriting, KPI measurement, and metrics tracking. If you're interested in hearing more, reach out to us! We'd be happy to use our insights from our current successful customers to build and implement a winning strategy for you:
Click here to find out more about IgnitePOST Managed Services

.svg)
Read more insights

-min.png)
Get expert insights for real mail campaigns
Everything you need to launch, run and scale handwritten card mail campaigns. Subscribe today!


.png)


Ready to create your first magic moment?🚀
Start using IgnitePOST today. It's free to signup!
No contracts, no commitment and unbelievable support.